Installing your Retro Radio
How To Articles

CarAudioStuff
Last Update há 5 anos
Instructions on how to install your assembled Retrosound Radio, if you have not yet assembled your radio, please read the guide HERE
STEP 1 - Connect your Wiring
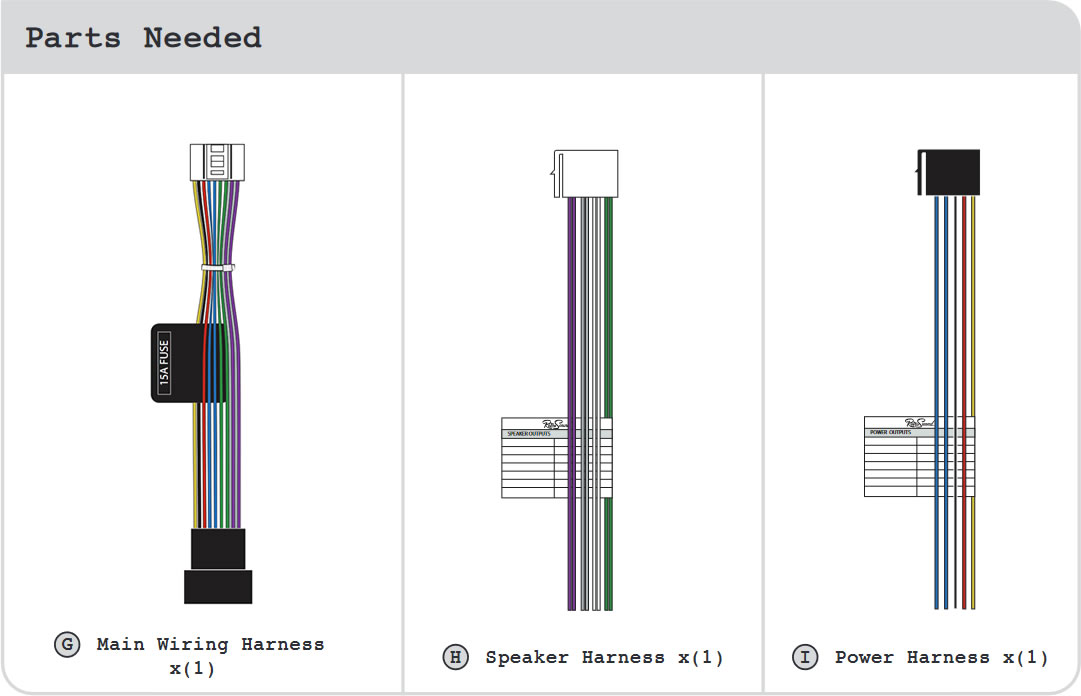
Locate the three wiring harnesses: Main Wiring Harness(G), Speaker Harness(H), and Power Harness(I) from your Radio Motor box. Using the Power Harness and Speaker Harness, connect the bare wire ends of your power and speaker wires to the appropriate power and speaker locations in your vehicle (see wiring diagram included in your Radio Motor box). Then connect the Main Wiring Harness to the back of the Radio Motor. Do not connect the Speaker and Power Harnesses to the Main Wiring Harness until after you have mounted your radio.
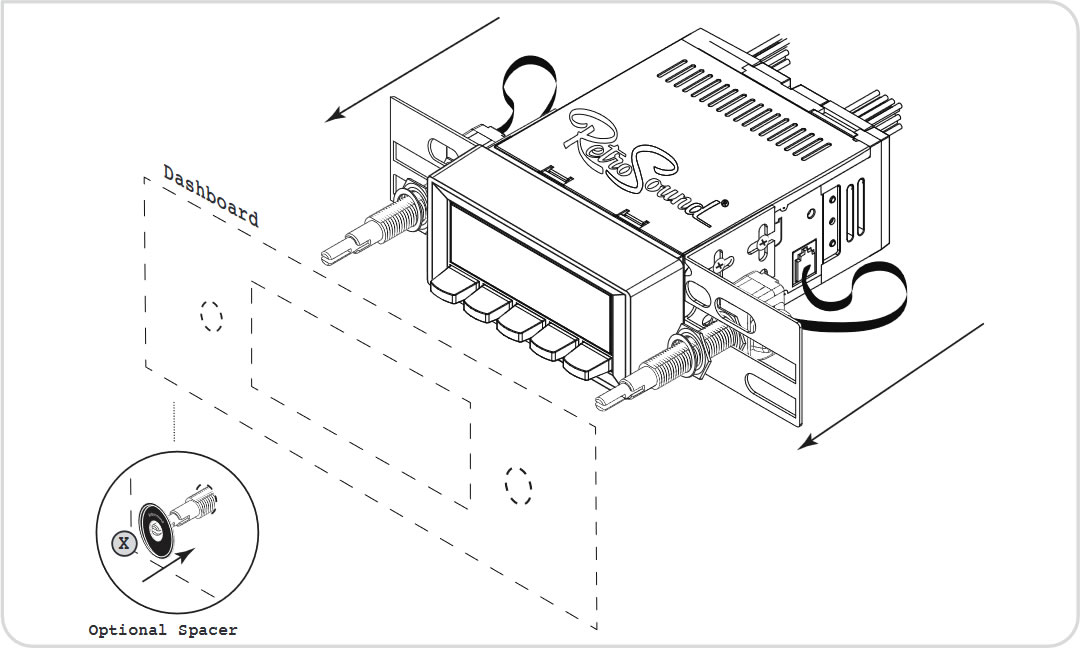
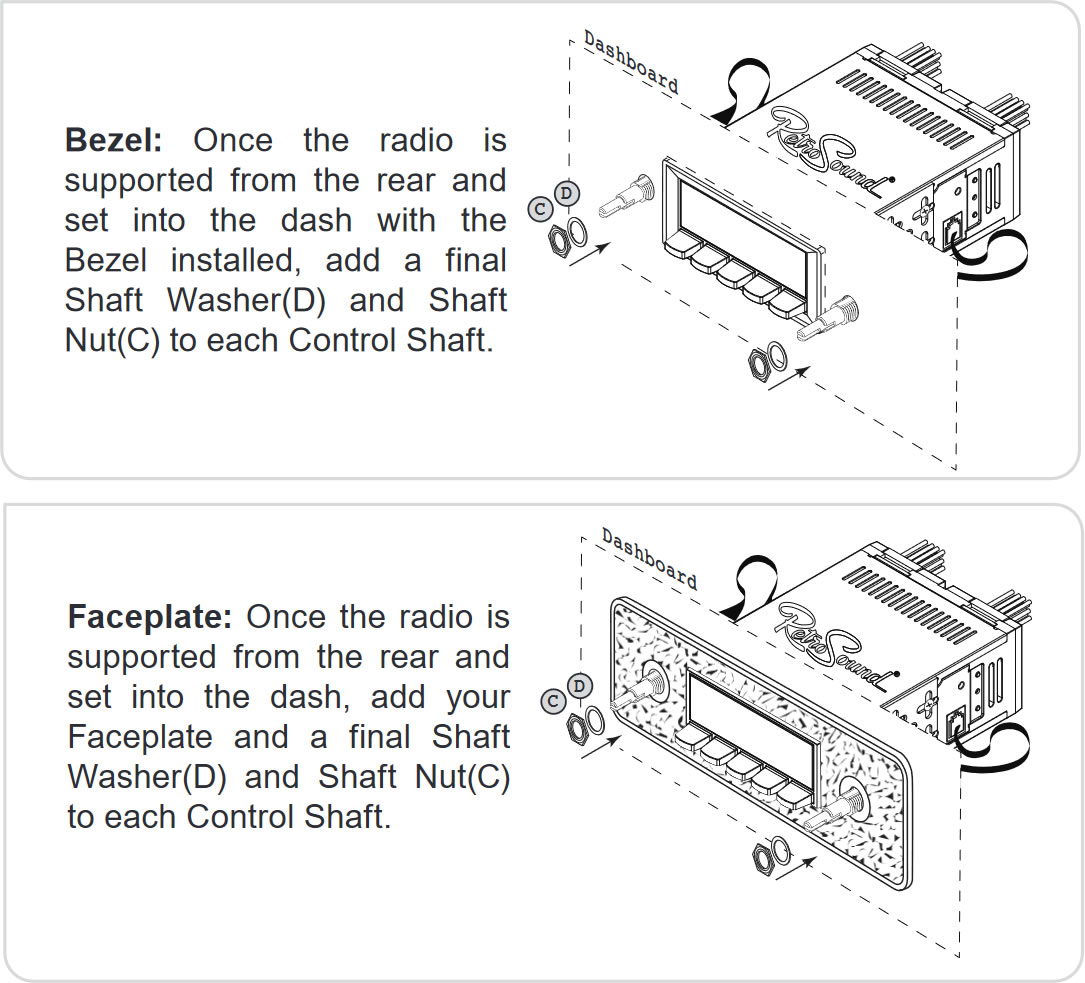
Step 2A - For Installation with a Bezel:
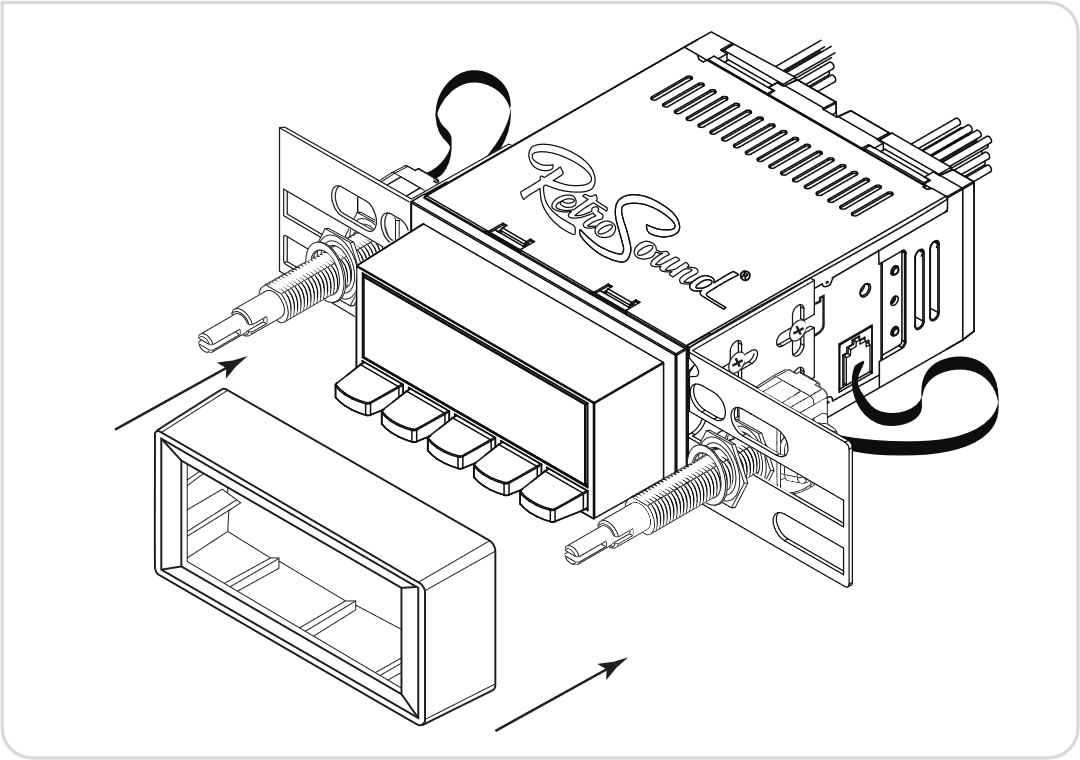
If you are using a Bezel, slide the Bezel over the Radio Face BEFORE inserting the assembled radio into the dash. To achieve a proper fit, you may need to use the Cupped Plastic Spacers(X) in front of the dash, before the final nuts and washers are applied. If the fit does not look correct for your particular installation, revisit Step #4 HERE to adjust the shaft depth as necessary.
Step 2B - For Installation with a Fascia/Faceplate:
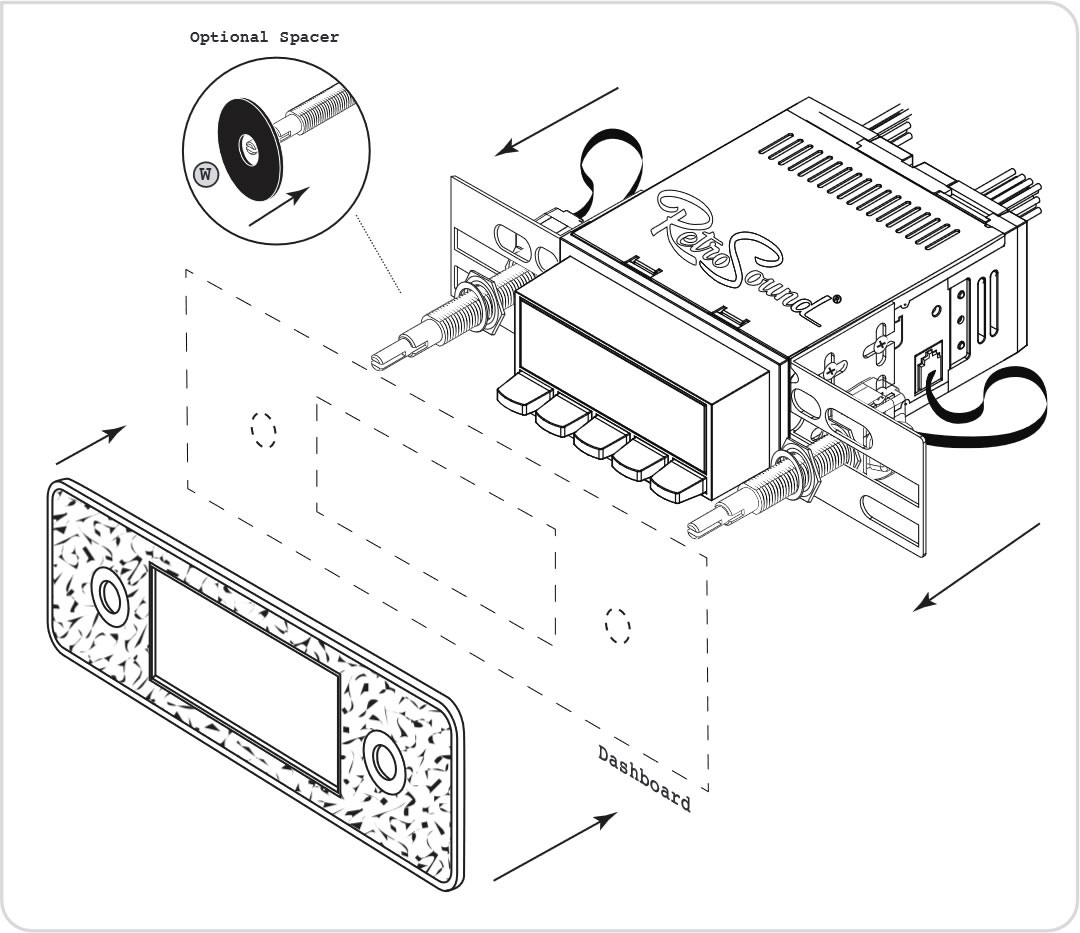
If you are using a Faceplate, slide the radio into the opening from behind the dash BEFORE adding the Faceplate. To achieve a proper fit, you may need to use the Large Plastic Spacers(W). If using the spacers, place them on the shafts behind the dash. Align the Faceplate over the shafts from the front of the dash. The Radio Face should align flush with the Faceplate, and the shafts should only protrude about a quarter inch past the Radio Face. If the fit does not look correct for your particular installation, revisit Step #4 HERE to adjust the shaft depth as necessary
IMPORTANT STEP: Attach the Backstrap!
Before completing the installation with the final nuts and washers, it is IMPORTANT that you secure the unit to your vehicle using the supplied Backstrap to support the unit’s weight properly. Failure to attach the Backstrap will damage the Control Shafts and void the warranty on the shafts.
STEP 3 - Attach the Backstrap
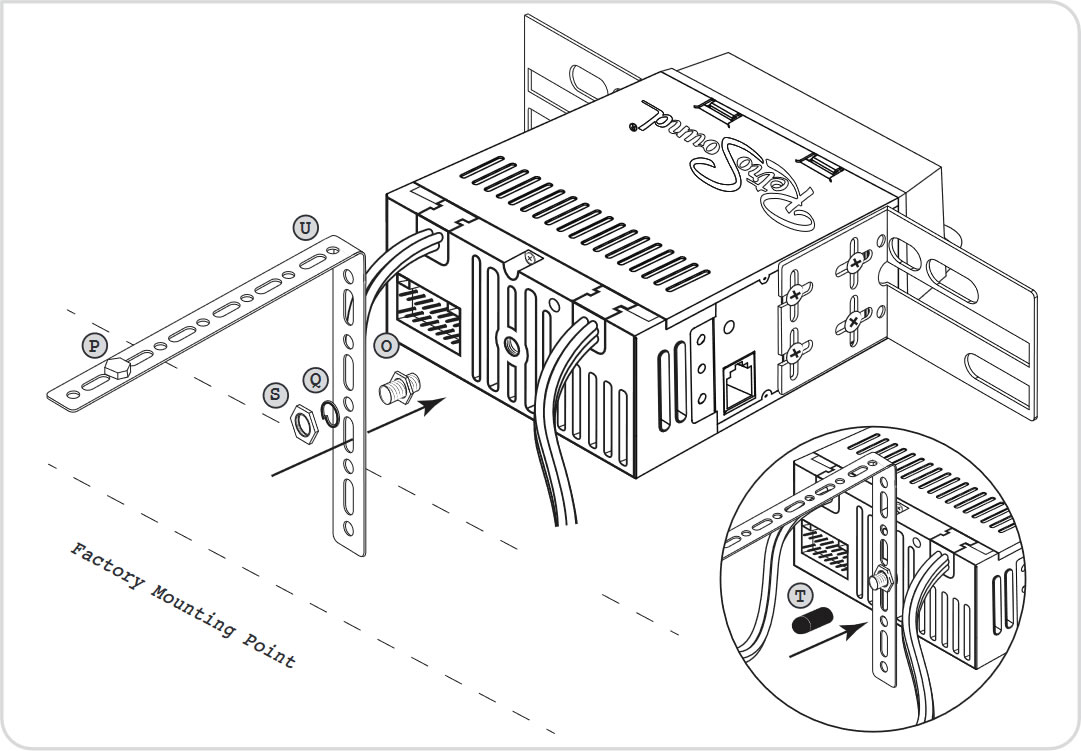
Before attaching the backstrap, connect both the Speaker Harness(H) and Power Harness(I) to the female plug of the Main Wiring Harness(G).
If you are using an AUX device, connect it at this time and route the cable to it’s proper location. Next, you will need to secure the back of the radio using the supplied Backstrap(U) and mounting hardware.
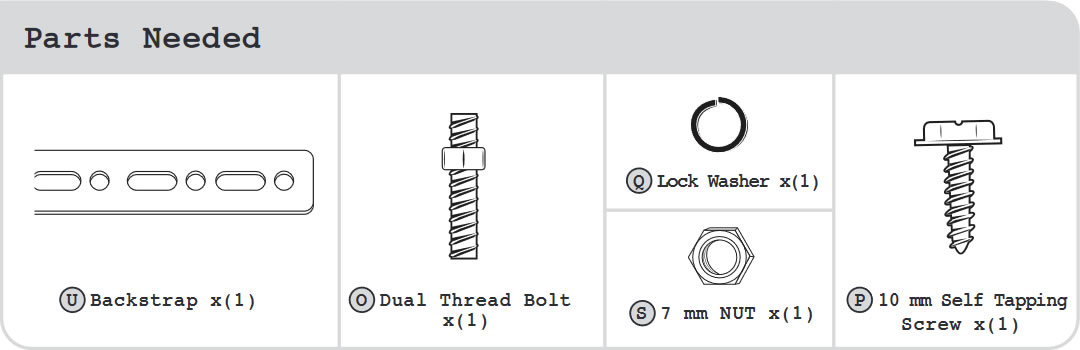
The backstrap mounts to the threads on the back of the Radio Motor using the Dual Thread Bolt(O), Lock Washer(Q), and 7 mm Nut(S) and can be bent or adjusted to align with the mounting point of the original factory radio behind the dash.
The Rubber Stopper(T) can be added if needed to cover the Dual Thread Bolt. Secure the other end of the backstrap to the factory mounting point on your vehicle using the 10 mm Self Tapping Screw(P) or the Self Tapping Screw(R).
STEP 4 - Completing the installation
To complete the installation of your radio, add the rear and front knobs to both Control Shafts.