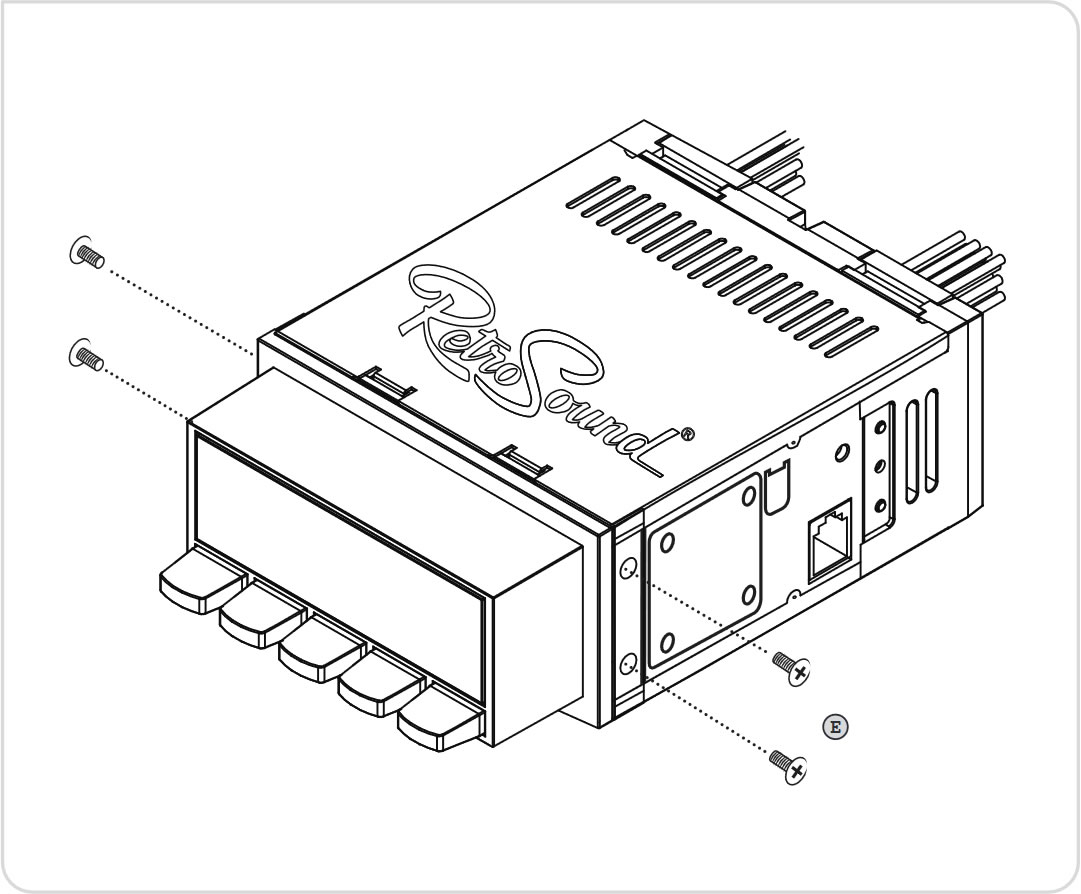
Building your Retro Radio
How To Articles

CarAudioStuff
Last Update 4 года назад
Instructions on how to assemble your new Retrosound Radio
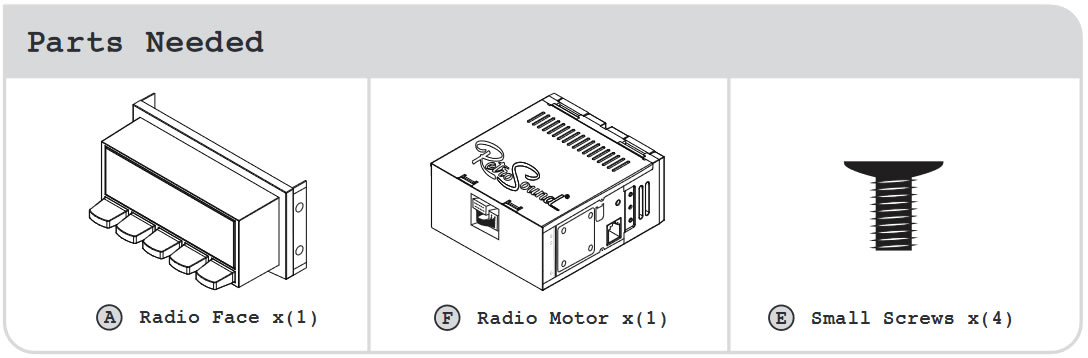
STEP 1 - Attach the ribbon cable to the radio face
Plug the ribbon cable from the Radio Motor (F) into the Radio Face (A). The ribbon cable is attached to the Radio Motor in the square opening on the front of the Radio Motor. Plug the loose end into the Radio Face making sure the other end is plugged into the Radio Motor securely.
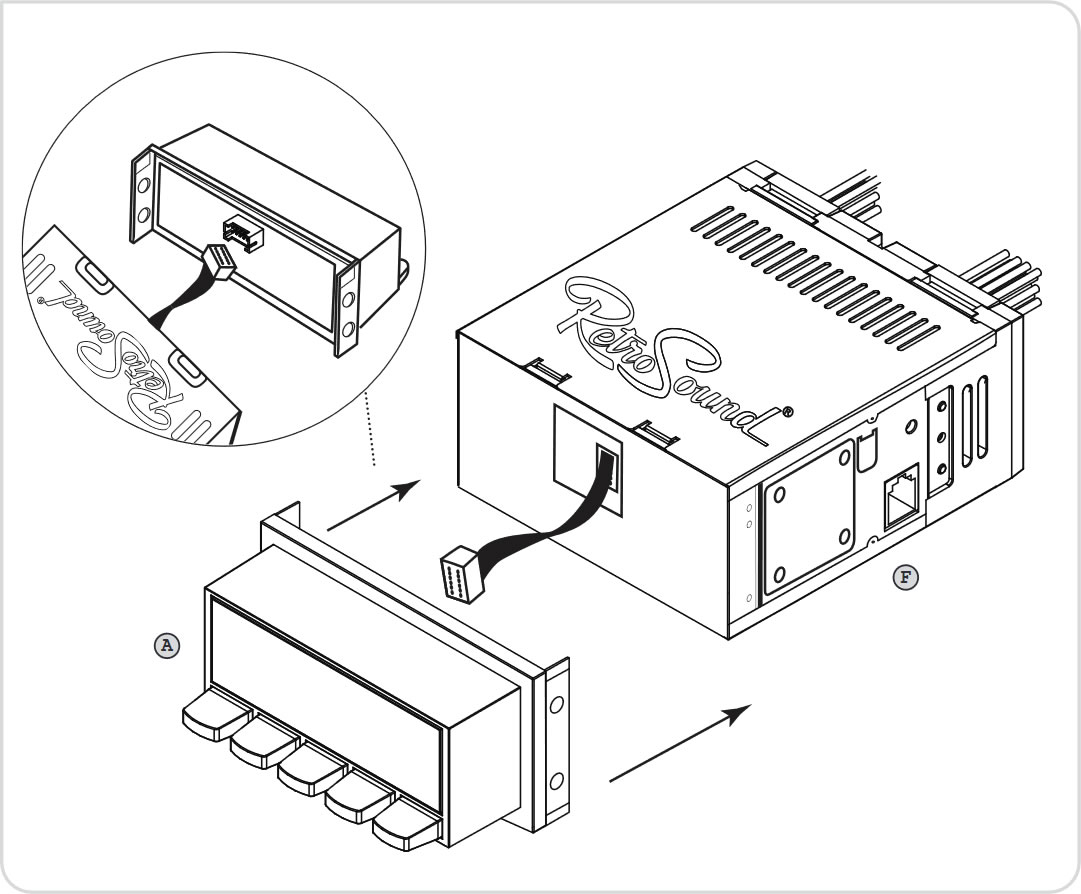
STEP 2 - Attach the radio face
Before attaching the Radio Face ensure the RetroSound® logo on the Radio Motor is facing upwards. Attach the Radio Face to the Radio Motor with the four Small Screws(E).
STEP 3 - Attach the InfiniMount Brackets
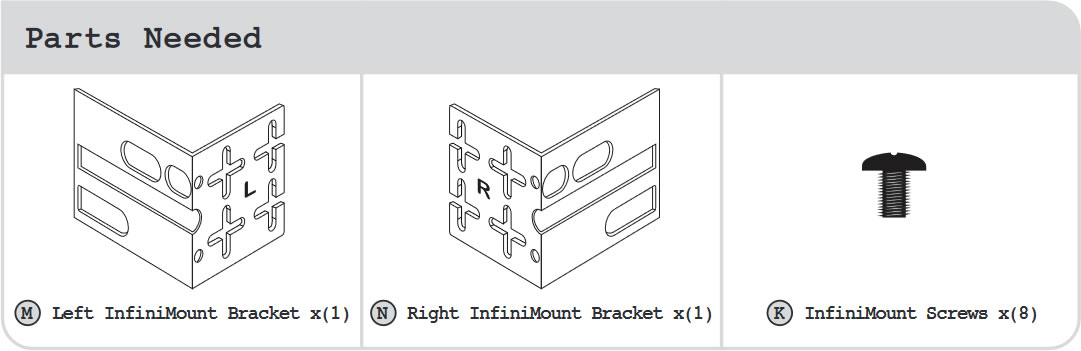
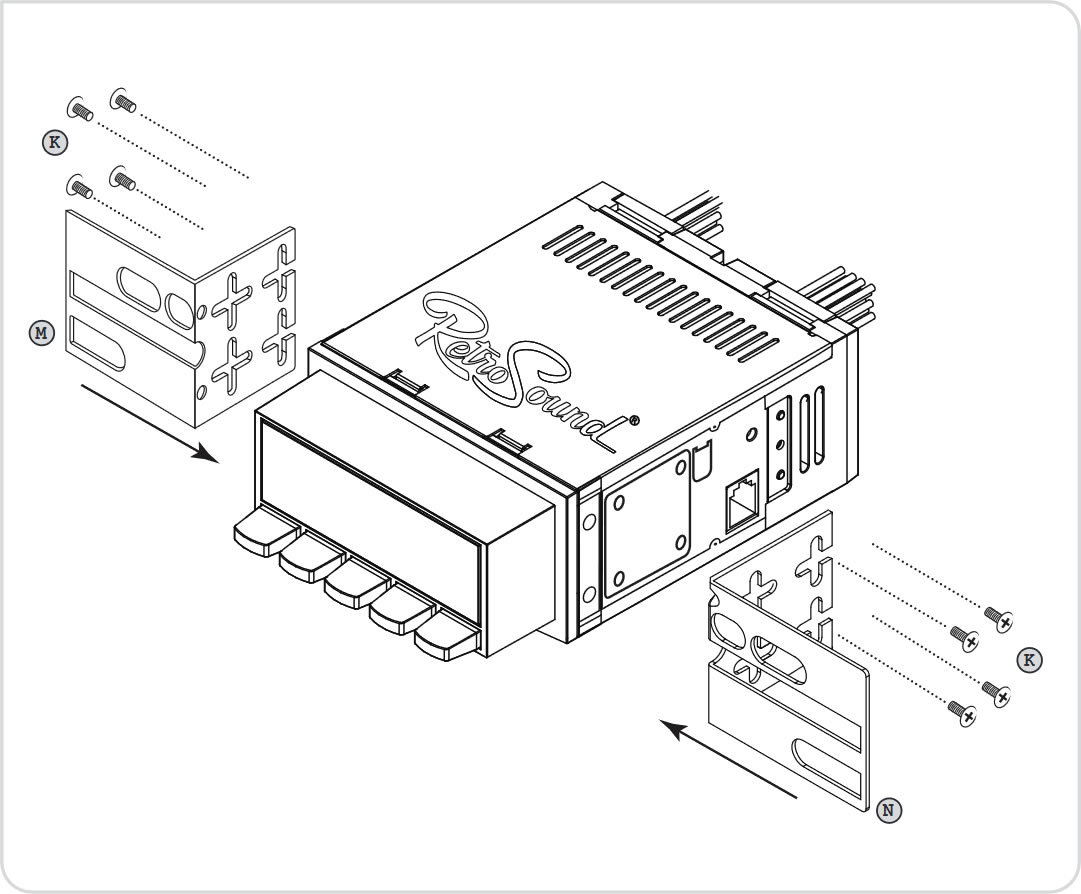
Attach both InfiniMount Brackets(M,N) to Radio Motor using the supplied InfiniMount Screws(K) (the brackets are marked with an “L” for left and an “R” for right). Make sure the RetroSound® logo on the Radio Motor is facing upwards. Before tightening the screws, you may also move the brackets forward, backward, up, or down as needed.
The InfiniMount Brackets may be rotated, cut, or bent to achieve the perfect fit. A minimum of two screws must be used on each bracket to secure them correctly.
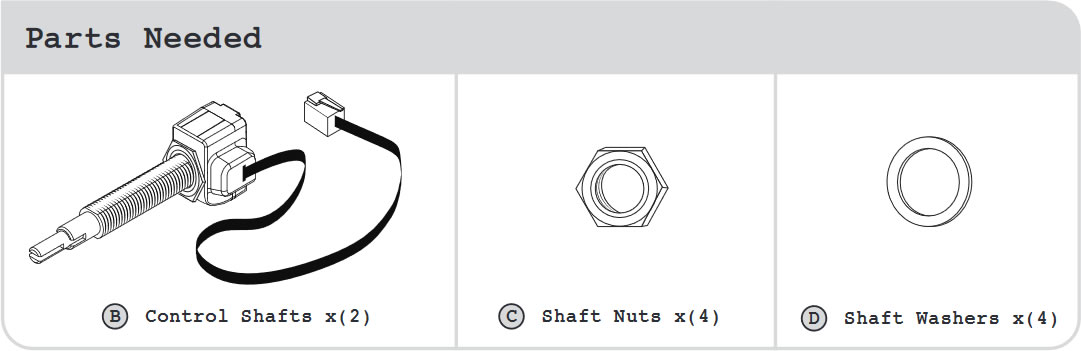
STEP 4 - Install the Control Shafts
STEP 4 part 1 Measure & Set the Shaft Width
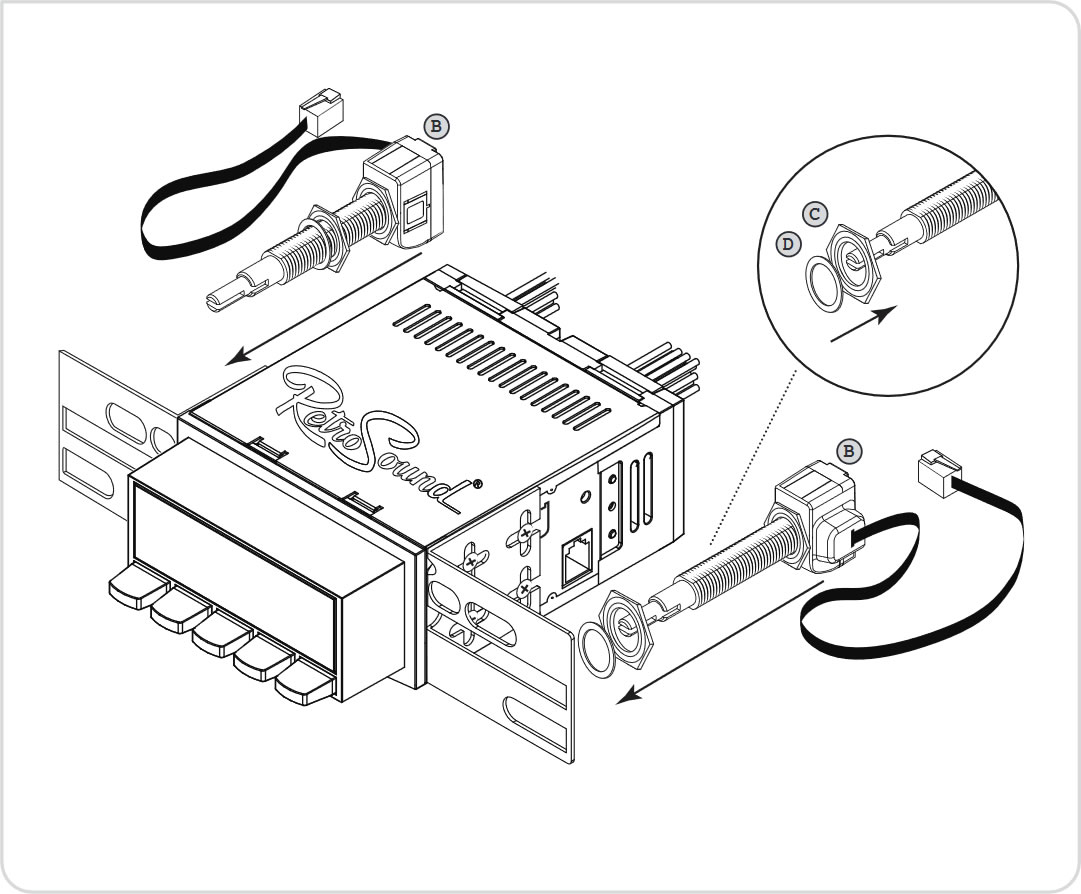
Measure vehicle dash for proper width (shaft hole center to center) and offset of the shafts (some vehicle shaft locations may be offset from the radio display). Match the shaft locations from your dash to the proper InfiniMount Bracket location. Place a Shaft Nut(C) and Shaft Washer(D) on each shaft about halfway down; the Shaft Nuts will be adjusted in the next step to set the proper depth.
STEP 4 part 2 Set Control Shaft Depth
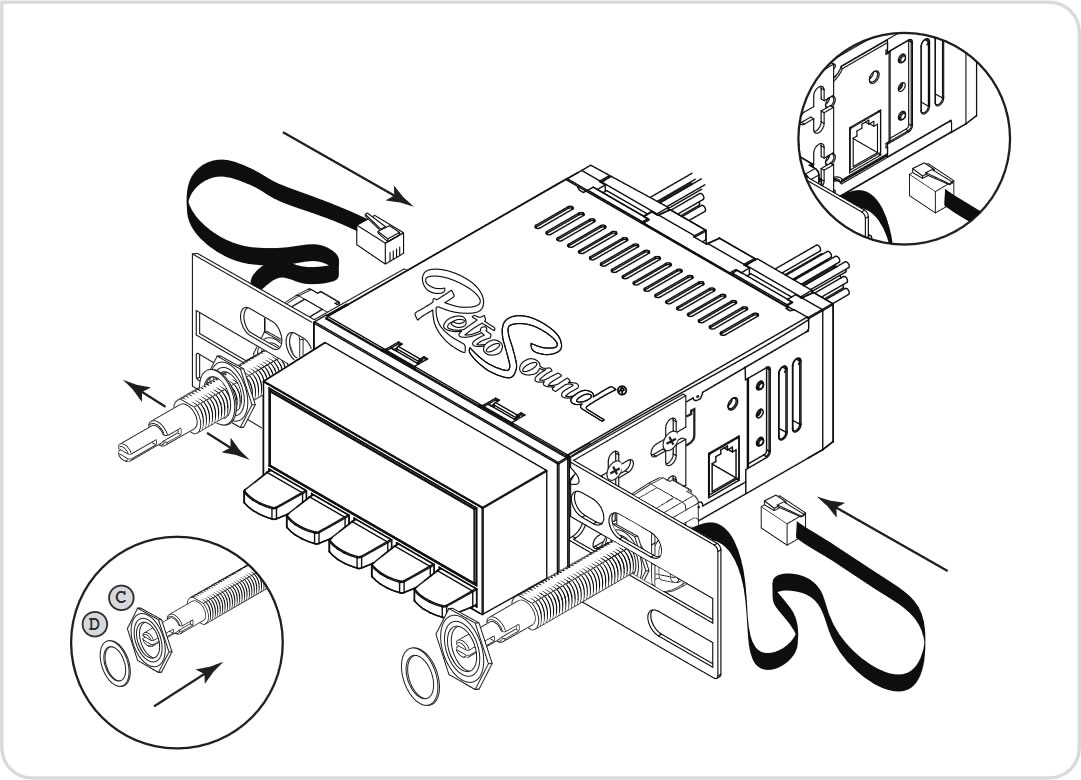
Insert the Control Shafts into InfiniMount Brackets, add a Shaft Nut(C), and Shaft Washer(D) to each shaft. To start, bring the shafts forward until the brass portion is about a quarter-inch past the display face. Adjust the depth of the shafts as needed by moving the shaft nuts forward or backward. Once you ensure the shafts are at the proper width and depth, snug down the shaft nuts to finger tight (DO NOT OVERTIGHTEN). With the shafts securely in place, plug the shaft cables into the Radio Motor.
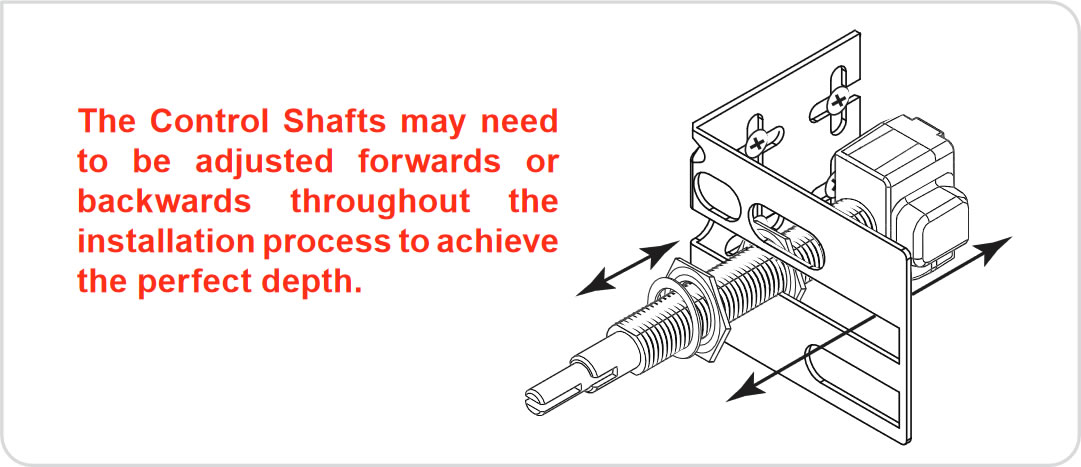
To Adjust the Control Shaft Depth
Once you have assembled your radio, proceed to the Install Guide HERE